How to Master the Art of Batch Cooking Grains for the Week

Stop Buying Pre-Cooked Grains: The Math Behind Batch Cooking
Let’s have a real conversation about the "convenience tax." You know the one. You’re standing in the grocery aisle, tired after a long shift, looking at those $6.00 microwaveable pouches of pre-cooked quinoa or brown rice. They look helpful, but they are a total scam. By the time you factor in the markup for the packaging and the labor, you’re paying nearly five times the price of the raw ingredient. As a former social worker, I spent years seeing how small, unnecessary expenses bleed a household budget dry. Now, as a health advocate, I’m here to tell you: the most effective way to reclaim your time and your money is through batch cooking grains.
Batch cooking isn't just about "meal prepping" for a fitness influencer's Instagram feed. It’s a tactical strategy. It is about ensuring that when you come home at 6:00 PM and the last thing you want to do is cook, you actually have a nutritious base ready to go. This prevents the $30 takeout order or the processed frozen meal that leaves you feeling sluggish. When you master your grains, you master your pantry, and when you master your pantry, you master your budget.
The Essential Grain Toolkit
Before we get into the stove-side mechanics, you need to know what you're working with. Not all grains are created equal, and each requires a different approach to texture and storage. If you treat quinoa like brown rice, you’re going to end up with a mushy mess that’s impossible to use in a salad.
- Brown Rice: The workhorse. It’s high in fiber and incredibly cheap when bought in bulk. It takes longer to cook (about 40-45 minutes), so it’s a great candidate for a Sunday batch session.
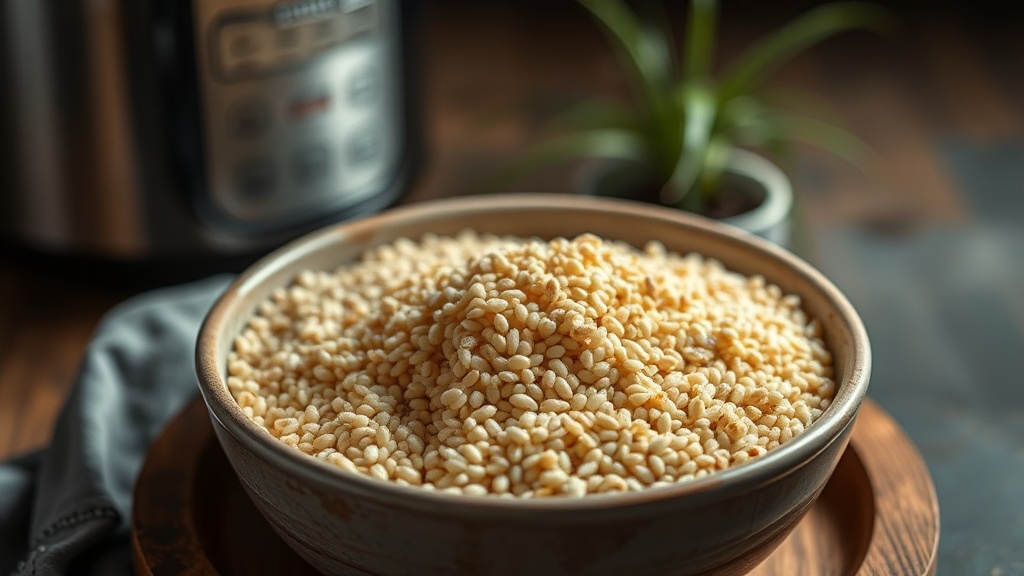
- Quinoa: A complete protein. It cooks quickly (about 15 minutes) and adds a nutty texture to bowls.
- Farro or Barley: These are chewy, hearty, and excellent for winter soups or hearty autumn salads. They provide a much more substantial "bite" than white rice.
- Couscous: Technically a pasta, but it functions like a grain in meal prep. It’s incredibly fast, making it perfect for last-minute additions.
- Oats: Don't forget your breakfast. Batch-cooking steel-cut oats is a game-changer for morning efficiency.
If you are looking to optimize your lifestyle during this transition into a new season, you might also be interested in how to manage your environment. Just as we prep our food, we must prep our living spaces. For instance, learning about remote work-life balance and spring cleaning tips can help you create a structured environment that supports your new healthy habits.
Step 1: The Golden Ratio and Cooking Methods
The biggest mistake people make is "eyeballing" it. If you want consistent results, you need to use a measuring cup. The ratio of liquid to grain is the foundation of everything we do here.
The Standard Ratios:
- Long-Grain Rice: 1 cup rice to 2 cups water.
- Quinoa: 1 cup quinoa to 2 cups water (or broth for more flavor).
- Farro/Barley: 1 cup grain to 3 cups liquid. These grains are thirstier because they are heartier.
The Flavor Hack: Never, ever cook your grains in plain water unless you are strictly avoiding sodium. To make these grains taste like something other than cardboard, replace half of your water with vegetable or chicken broth. Add a pinch of salt, a bay leaf, or even a teaspoon of coconut oil to the pot. This small investment in flavor prevents "palate fatigue," which is the main reason people stop meal prepping and go back to ordering out.
Step 2: The Batch Cooking Workflow
Don't try to cook one grain at a time. That is a waste of energy and time. If you have two burners and two pots, use them. Here is how I approach a "Grain Sunday":
1. The Soak (Optional but Recommended): If you are cooking harder grains like farro or certain types of brown rice, soak them in water for a few hours or overnight. This reduces cooking time and helps with digestibility.
3. The Steam Finish: Once the liquid is absorbed, do not just turn off the heat and scoop it out. Turn off the heat, keep the lid on, and let it sit for 10 minutes. This "resting" period allows the steam to finish the job, ensuring the grains are fluffy rather than gummy. This is the difference between a professional-grade meal and a mediocre one.
Step 3: Storage and Longevity
This is where most people fail. They cook a giant pot of rice, leave it on the counter to cool, and then shove it into a Tupperware container. Stop doing that.
To keep your grains safe and tasty, follow these rules:
- Cool Rapidly: Spread the cooked grains out on a baking sheet to let the steam escape. Once they are no longer steaming but still warm, move them to airtight containers.
- The 4-Day Rule: Most cooked grains stay fresh in the refrigerator for 4 to 5 days. If you cooked a massive amount, do not be afraid to freeze them. Cooked quinoa and rice actually freeze beautifully in silicone molds or freezer bags.
- Avoid the "Wet" Trap: If you are making a grain salad, keep the grains and the dressing separate until the moment you eat. Moisture is the enemy of shelf life.
As we move into the spring months, keeping your food storage organized is part of a larger wellness strategy. If you find yourself struggling with seasonal shifts, you might find our guide on syncing your diet and home for bio-harmony helpful for managing wellness during allergy season.
How to Use Your Grains Throughout the Week
A batch of grains is a blank canvas. To prevent boredom, you must change the "profile" of the grain at every meal. Do not eat the same bowl three days in a row.
Day 1: The Mediterranean Bowl
Take your cooled quinoa, add chopped cucumbers, cherry tomatoes, feta cheese, and a squeeze of lemon. It’s fresh, light, and requires zero actual "cooking" during your lunch break.
Take your leftover brown rice, toss it into a hot pan with a little soy sauce, ginger, garlic, and whatever frozen veggies you have on hand. The rice will slightly crisp up, giving it a much better texture than freshly cooked rice.
Take your farro, toss it with roasted sweet potatoes, kale, and a balsamic vinaigrette. The density of the farro makes this a very filling dinner that feels expensive, even though the cost per serving is pennies.
The Bottom Line on Budgeting
I want you to look at your grocery receipt. Look at the "prepared" section—the salads, the pre-cooked grains, the snack packs. Now, look at the "bulk" or "dry goods" section. The math is undeniable. By spending one hour on a Sunday batch-cooking grains, you are essentially buying back your time and your future grocery budget.
It isn't about being perfect; it's about being prepared. When you have a base of nutritious, low-cost grains ready to go, you are much less likely to make impulsive, expensive, and unhealthy food decisions. That is how you build a sustainable lifestyle that doesn't require a massive paycheck.
"Budgeting isn't about deprivation; it's about intentionality. It's choosing to spend your money on things that actually fuel your life rather than things that just save you five minutes of effort."
If you are looking for more ways to keep your home and lifestyle sustainable and cost-effective as the seasons change, check out our tips on sustainable crafting for families or explore our deep dives into writing content that cuts the noise to stay informed on smart spending.
Steps
- 1
Choose your grain and ratio
- 2
Simmer to perfection
- 3
Cool and portion out