How to Make Your Own Nut Butter at Home

You are standing in the grocery aisle at a store like Trader Joe's or Whole Foods, staring at a single jar of organic almond butter that costs $9.99. You do the math and realize that if you buy a large bag of whole almonds instead, you can make several jars for a fraction of that price. This guide shows you exactly how to make your own nut butter at home using a standard food processor or high-speed blender, ensuring you control the ingredients and keep your grocery bill low. Making your own nut butter isn't just about saving money; it is about avoiding the cheap palm oil, refined sugars, and excessive salt often hidden in commercial brands.
The Math: Why Making Your Own Saves Money
Let's look at the hard numbers. A standard 16-ounce jar of premium peanut butter or almond butter often retails for between $6.00 and $11.00. If you buy a 32-ounce bag of dry roasted peanuts or almonds in bulk from a warehouse club like Costco or a local bulk bin, your cost per ounce drops significantly. For example, a large bag of peanuts might cost you roughly $0.15 per ounce, whereas the processed jar can cost upwards-of $0.60 per ounce. By spending 10 minutes at your blender once a week, you are effectively cutting your healthy fat costs by nearly 75%.
Beyond the direct cost of the nuts, you are also investing in quality. Commercial nut butters often use "filler" oils to maintain a creamy texture. When you make it yourself, you use the natural oils released from the nuts during the grinding process. This means you aren't paying for cheap vegetable oils that offer zero nutritional value. If you want to stretch your budget even further, look for nuts that are slightly "imperfect" or on sale in the bulk section, as the flavor profile remains identical once pulverized.
Essential Equipment and Ingredients
You do not need a specialized industrial grinder to achieve a professional result. Most of the tools required are likely already in your kitchen pantry. To get started, gather the following items:
- A High-Speed Blender or Food Processor: A food processor is generally better for thicker nut butters because the wider base allows the blades to move the heavy mass more easily. If using a blender, you may need to stop and scrape the sides frequently.
- A Rubber Spatula: You will need this to scrape the sides of the container to ensure all the nut particles are being processed.
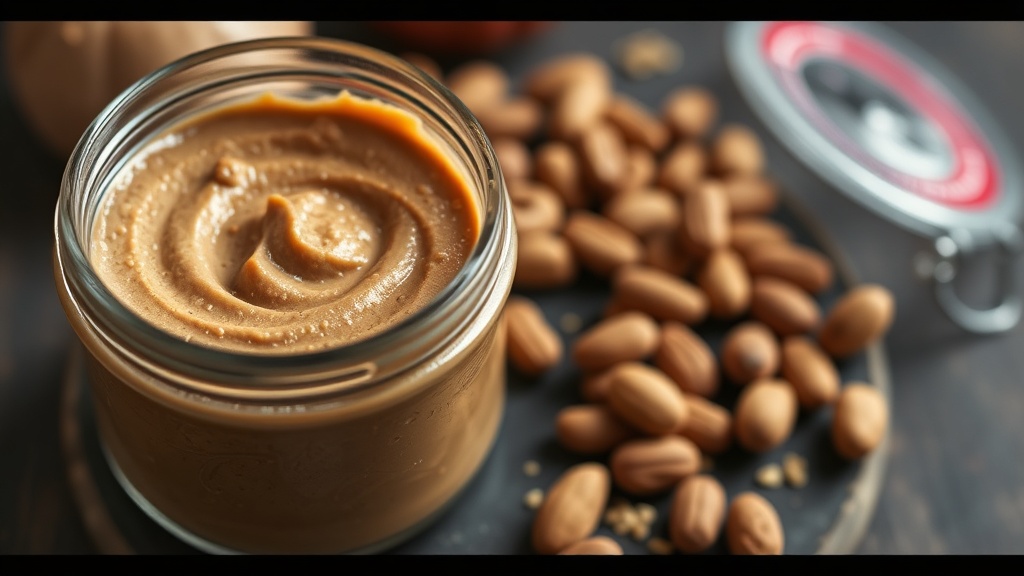
- The Nuts: You can use peanuts, almonds, cashews, walnuts, or sunflower seeds. For the best results, use nuts that are dry-roasted.
- Optional Add-ins: Sea salt, honey, maple syrup, cocoa powder, or cinnamon.
When selecting your nuts, check the ingredient list on the bulk bag. Ensure there are no added oils or preservatives. If you are making sunflower seed butter (often called SunButter), ensure the seeds are highly toasted to bring out the nutty flavor, as raw seeds can sometimes have a bitter aftertaste.
Step-by-Step Instructions for Perfect Nut Butter
The process varies slightly depending on the type of nut you are using, but the fundamental mechanics of friction and oil release remain the same. Follow these steps for a consistent texture every time.
Step 1: Prep Your Nuts
If you are using raw nuts, you must roast them first. Roasting is non-negotiable because the heat helps release the natural oils that create the "butter" consistency. Spread your nuts on a baking sheet and roast them in an oven at 350°F (175°C) for about 10 to 15 minutes. You want them to be golden brown and fragrant. If you use raw nuts, your end product will be a gritty paste rather than a smooth butter.
Step 2: The Initial Pulse
Place your warm nuts into the food processor. Start by pulsing the machine. At this stage, the nuts will turn into a coarse, sandy meal. Do not be alarmed when the mixture looks dry; this is a normal part of the transition from solid to liquid.
Step 3: The Grinding Phase
Once the nuts are a fine powder, turn the processor to a continuous run. This is where the work happens. You will move through three distinct stages:
- The Paste Stage: The powder begins to clump together into a thick, heavy mass.
- The Ball Stage: The mixture may form a single large ball that rotates around the blade. This is the most difficult part of the process.
- The Liquid Stage: The friction and heat from the blades will finally release the oils, and the ball will break down into a smooth, flowing liquid.
Pro-Tip: If your machine is struggling or getting too hot, stop the processor and let it rest for two minutes. You can also add one teaspoon of a neutral oil (like avocado oil) if you want to speed up the process, but for the most budget-friendly version, rely solely on the nut's own oils.
Step 4: Adding Flavor and Texture
Once the butter reaches your desired consistency, add your seasonings. If you want a "crunchy" style nut butter, pulse the machine a few times at the very beginning with a handful of whole nuts, set them aside, and stir them back in at the end. If you want a sweet version, add a teaspoon of honey or maple syrup now. If you are making chocolate nut butter, add unsweetened cocoa powder. Mix thoroughly with a spatula to ensure the flavor is evenly distributed.
Troubleshooting Common Issues
Even with a good recipe, things can go wrong. Here is how to fix the most common mistakes:
The butter is too thick/dry: This often happens with almonds or cashews, which have less oil than peanuts. If it won't turn into a liquid, add one tablespoon of a neutral oil (like grapeseed or avocado oil) at a time while the processor is running. Do not add water, as water will cause the oils to separate and create a grainy, unappetizing texture.
The motor is overheating: High-speed blending creates significant friction. If you smell something burning or the motor slows down, stop immediately. Transfer the mixture to a bowl, let it cool, and then resume processing in shorter bursts. This is common when making heavy nut butters like cashew butter.
The texture is gritty: If you didn't roast the nuts long enough or if your blender isn't powerful enough, you might end up with a grainy texture. To fix this, continue processing for longer intervals. If it remains gritty, you can use the "smooth" butter as a base for a smoothie or stir it into oatmeal rather than wasting it.
Storage and Shelf Life
Because you are not using the chemical stabilizers and emulsifiers found in store-bought brands, homemade nut butter has a shorter shelf life. However, it is still very safe if handled correctly.
- Refrigeration: Store your nut butter in a glass jar in the refrigerator. This will keep it fresh for approximately 1 to 2 months. The cold temperature also helps prevent the oil from separating too quickly.
- Oil Separation: It is perfectly normal for a layer of oil to rise to the top of your homemade butter. This is a sign of a natural product. Instead of throwing it away, simply stir it back in with a knife before each use.
- Room Temperature: You can keep it in the pantry for about 2 weeks, but for the best quality and to prevent rancidity, the fridge is your best bet.
If you find yourself making large batches, you can also freeze nut butter. Place the butter in a freezer-safe container or even a silicone mold. It will stay good in the freezer for up to 6 months. When you are ready to use it, let it thaw in the refrigerator overnight.
Variations to Keep Your Diet Interesting
Once you master the basic technique, you can experiment with different flavors to prevent "palate fatigue." Using different bases is a great way to vary your nutrition. For example, sunflower seed butter is a great, lower-cost alternative for those with nut allergies, and it pairs exceptionally well with sea salt.
- Honey Roasted Peanut Butter: Add a tablespoon of honey and a pinch of salt during the final mixing stage.
- Dark Chocolate Almond Butter: Add 2 tablespoons of dark cocoa powder and a small amount of maple syrup.
- Savory Cashew Butter: Skip the sweetener and add a dash of garlic powder and smoked paprika. This is excellent as a base for a quick satay-style sauce for vegetables.
By making these small adjustments, you can use your homemade nut butter in various ways—from a topping for leftover grains like oatmeal to a protein-rich spread for toast. This keeps your breakfast routine from becoming repetitive while staying strictly within your budget.
Steps
- 1
Roast your nuts to enhance flavor
- 2
Blend on low speed to avoid overheating
- 3
Add a pinch of salt or a drizzle of oil if needed
- 4
Continue blending until the texture is smooth