How to Make Your Own Creamy Nut Butters at Home

Stop Paying the "Brand Premium" for Nut Butters
Most people believe that high-quality, creamy nut butter requires a specialized food processor or a premium price tag. They see the $12 jars of organic almond or cashew butter at high-end grocery stores like Whole Foods and assume that is the only way to get a smooth texture. This is a misconception. You do not need expensive machinery or a massive budget to create a professional-grade spread. In fact, making your own nut butter is one of the most effective ways to control your ingredients and slash your grocery bill. By purchasing bulk nuts and processing them yourself, you eliminate the cost of branding, fancy packaging, and unnecessary additives like palm oil or refined sugars.
This guide provides the exact math, equipment, and technique required to make creamy nut butters at home. Whether you want classic peanut butter, creamy almond butter, or a savory sunflower seed spread, the process is fundamentally the same. We will focus on the science of oil release and the practical steps to ensure you don't end up with a gritty mess or a broken emulsion.
The Math of the Markup
Before we get into the kitchen, let's look at the numbers. If you buy a 16-ounce jar of premium almond butter, you are often paying upwards of $1.50 per ounce. If you buy a 32-ounce bag of whole almonds from a bulk bin at a store like ALDI or a local co-op, your cost per ounce drops significantly. When you factor in that you are paying for the convenience of the grind, the markup is substantial. By making your own, you are investing in healthy pantry staples that cost less and control your own nutritional density. You decide exactly how much salt or sweetener goes in, or if any goes in at all.
Essential Equipment
You do not need a $500 high-speed blender to make nut butter. However, you do need a tool that can handle the friction and heat generated during the grinding process. If your equipment is too weak, you will burn out the motor before the oils are fully released.
- High-Speed Blender: A Vitamix or Blendtec works exceptionally well because they are designed to handle high-friction loads, but they can be overkill for a single batch.
- Food Processor: This is the most common tool for home cooks. A standard Magimix or Cuisinart food processor is capable of making nut butter, but you must be patient.
- Heavy-Duty Blender: If using a standard blender, ensure it has a high-wattage motor.
- Rubber Spatula: You will need this to scrape down the sides of the bowl constantly.
- Glass Jar: For storage. Glass is better than plastic as it doesn't retain odors and is easier to sanitize.
The Science of the Process: Three Stages of Grinding
Making nut butter is not a single continuous blend. It is a process of gradual transformation. Regardless of the nut you use, you will pass through three distinct stages. Understanding these stages will prevent you from panicking when the texture looks "wrong" halfway through.
- The Crumb Stage: This is the first 2 to 5 minutes. The nuts are being chopped into small, gritty pieces. It looks like coarse sand or meal. Do not add liquid or oil here; the nuts need to stay dry to create friction.
- The Paste Stage: As the nuts continue to break down, they begin to release their natural oils. The mixture will turn into a thick, heavy, clumpy paste. This is where most people get frustrated and think the machine is broken. It is not. Keep going.
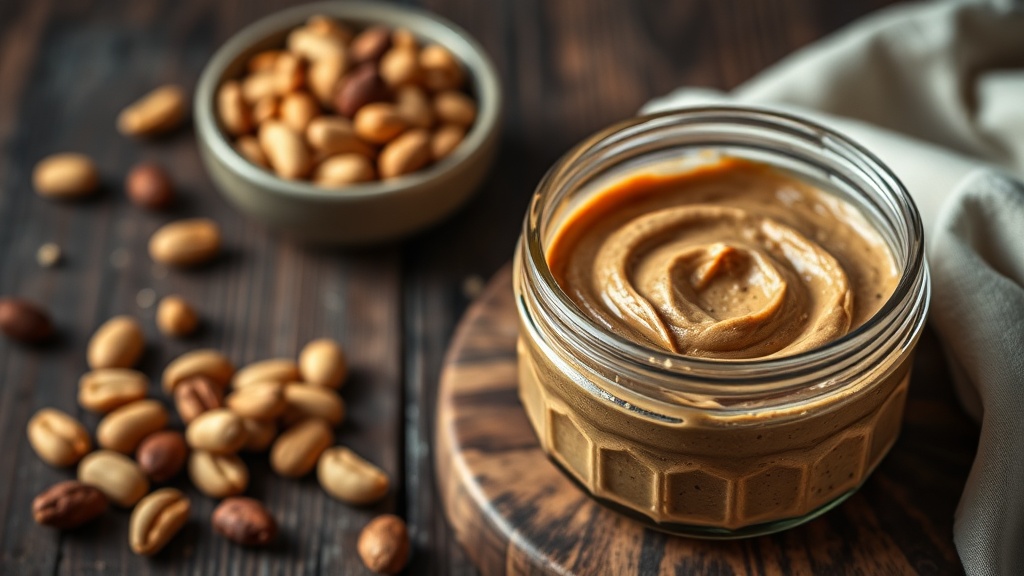
- The Liquid Stage: This is the goal. The natural oils have fully emulsified with the nut solids, and the mixture becomes a fluid, pourable liquid. This can take anywhere from 5 to 15 minutes depending on your machine.
Step-by-Step Instructions for Creamy Nut Butter
Follow these steps for the best results. This method works for peanuts, almonds, cashews, walnuts, or sunflower seeds.
Step 1: Toast the Nuts
While you can skip this step, toasting is the difference between a "meh" homemade spread and a professional one. Toasting the nuts enhances the flavor through the Maillard reaction and helps release the natural oils more easily during grinding. Spread your nuts in a single layer on a baking sheet. Bake at 350°F (175°C) for 10 to 15 minutes. You are looking for a golden color and a fragrant aroma. Do not overcook them, or the butter will taste bitter.
Step 2: The Initial Grind
Let the toasted nuts cool for a few minutes, then place them in your food processor. Start processing on a medium speed. If you are using a food processor, you must stop every 2 minutes to scrape down the sides with your spatula. This ensures all the pieces are being processed equally and prevents the motor from overheating.
Step 3: The Patience Phase
Once the mixture reaches the "clumpy paste" stage, do not add water. Water is the enemy of nut butter; adding even a teaspoon of water can cause the proteins to seize, turning your creamy butter into a grainy, unappetizing sludge. If you want a thinner consistency, you can add a teaspoon of a neutral oil (like grapeseed or avocado oil), but generally, the natural oils are sufficient.
Step 4: Flavoring and Seasoning
Once the butter is completely smooth and fluid, turn the machine to its lowest setting and add your seasonings. This prevents the spices from getting stuck in the blades. Common additions include:
- Salt: A pinch of sea salt or kosher salt.
- Sweetener: A drizzle of maple syrup or honey (add very carefully to avoid seizing).
- Spices: Cinnamon for almond butter, or a touch of cayenne for a spicy peanut butter.
Troubleshooting Common Issues
The butter is too thick: This usually means you haven't processed it long enough. The oils haven't fully released. Continue blending. If it is still too thick after 15 minutes of heavy processing, add one teaspoon of a neutral oil at a time.
The butter is grainy: This can happen if the nuts were not toasted sufficiently or if you used an older, drier nut. It can also happen if you stop the process too early. If you want a "crunchy" version, simply stop the process at the "Crumb Stage" and add some roughly chopped nuts at the end.
The motor is getting hot: This is a real danger. High-speed grinding creates heat. If your food processor feels hot to the touch, stop immediately. Transfer the mixture to a bowl, let it cool, and then resume. Forcing it can burn out your machine's motor.
Storage and Shelf Life
Because you are not using stabilizers or preservatives, homemade nut butter has a shorter shelf life than store-bought versions. However, it is still quite stable. Store your finished product in an airtight glass jar. If you keep it in the refrigerator, it will stay fresh and creamy for up to 2 months. If you keep it in the pantry, aim to use it within 3 to 4 weeks. If you find the oil separating at the top (which is normal for natural products), simply stir it back in before use.
Making your own nut butter is a fundamental skill for anyone looking to optimize their food budget without sacrificing quality. It removes the guesswork of ingredients and puts the control back in your hands. Start with a simple peanut butter, master the timing, and then move on to more expensive varieties like cashew or pistachio. The savings will add up quickly.
Steps
- 1
Roast your nuts to enhance flavor
- 2
Blend until smooth and creamy
- 3
Add a touch of oil or sweetener if desired
- 4
Store in a cool, dry place